Blog · Mixing from start to finish · Part 18 of 20
Movement and automation: keeping a mix alive from intro to outro
How to use fader and send automation section by section, add rhythmic filter movement that stays in time, give an intro or a breakdown its own texture, and keep the song moving without clutter.
Over seventeen parts we built a mix that is balanced, clear, controlled, spacious and wide. Yet a mix that never changes can feel like one long loop. This part is about movement: the small changes over time that mark each new section and keep the listener listening.
Why a good static mix still needs to move
The arrangement already moves: parts come in and drop out, the chorus is bigger than the verse. The mix can underline that. Guitars 1 dB louder in the chorus, a pad a little further back in the verse, a reverb that blooms only on the last word of a line: none of these is dramatic alone, but together they make the song feel like it is going somewhere. The goal is contrast between sections, not constant activity.
Fader and send automation: small moves, big effect
Start with the fader, and work section by section rather than bar by bar; riding the vocal line by line was part 11. Play from a few bars before each change so you hear it the way a listener will.
- Lift the instrument bus by 1 to 2 dB in the chorus, or pull the verse pad down by 2 or 3 dB, rather than turning everything up.
- Take something away for the bar before a chorus so the chorus lands harder.
- Automate sends: raise a delay or reverb send on the last word of a phrase for a throw, as in part 15, and pull it down before the next line.
- Fader automation comes after the channel’s plugins, so it doesn’t change how hard they are driven; automating clip or input gain does.
- Check every move in the full mix, at the balance you set in part 3.
Two passes are often enough: one for the big section levels, one for the details. If you find yourself moving a fader in every bar, the problem is usually the balance or the arrangement, not the automation.
Rhythmic movement with VEIRA Motion Filter
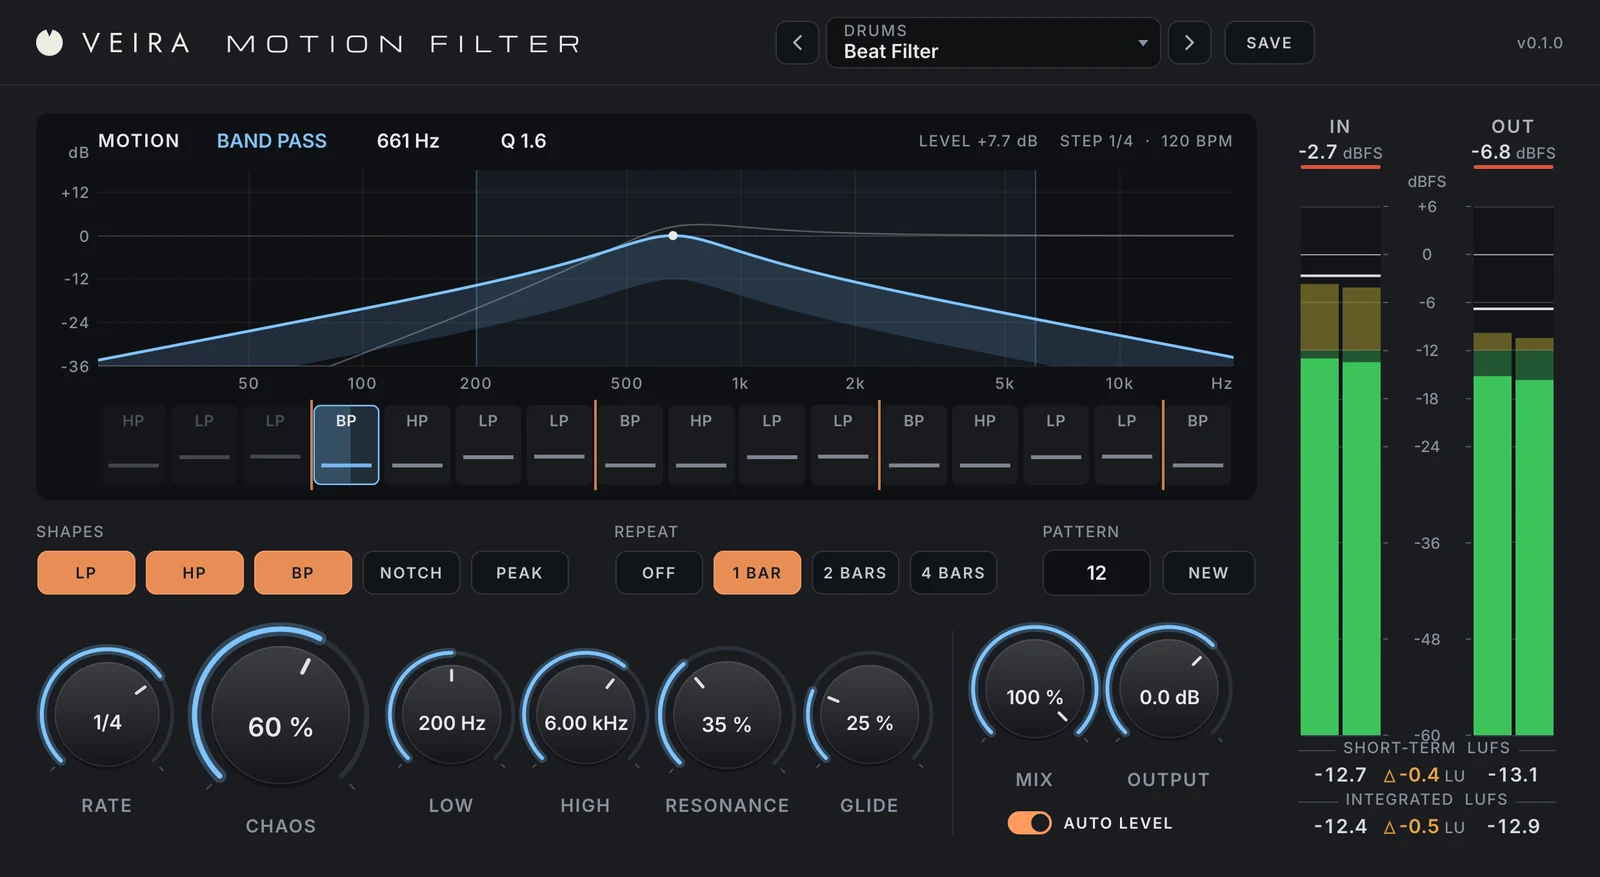
Some parts need movement inside a section: a pad that pulses, an arpeggio that opens and closes, a drum loop in a breakdown. VEIRA Motion Filter changes on every step of the song: it picks one of the SHAPES you light (LOW PASS, HIGH PASS, BAND PASS, NOTCH or PEAK), a cutoff between LOW and HIGH and a resonance up to what RESONANCE allows, then glides there. RATE sets how long a step lasts, from a 32nd note to a whole bar.
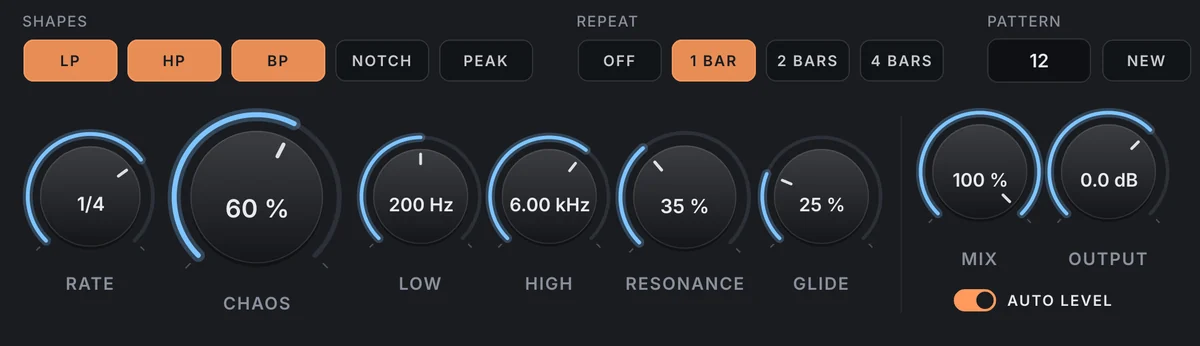
For a pad, try RATE at 1/8, LOW PASS and BAND PASS lit, LOW at 200 Hz and HIGH at 5 kHz, CHAOS around 50 %, RESONANCE around 35 % and GLIDE around 25 %. CHAOS sets how far the cutoffs spread: at 0 % only the shape changes, at 100 % the cutoff can land anywhere from LOW to HIGH. Each pattern is a number from 1 to 999; press NEW until one grooves, and REPEAT loops it every 1, 2 or 4 bars so the movement becomes a riff the ear can follow.
Two things make it easy in a mix. Every step is worked out from the song’s position, so every playback and every bounce sounds the same. And AUTO LEVEL keeps the sound as loud as it came in, so the steps move the tone, not the level, and the part stays where you balanced it. MIX blends in the dry signal; at 30 to 50 % the part keeps its body with the movement on top.
From hard cuts to slow sweeps
GLIDE decides the character. At 0 % the filter jumps from step to step, for a chopped, gated rhythm. At 10 to 40 % it slides into each step and holds, the classic rhythmic filter. At 50 to 80 % it sweeps through most of the step, and at 100 % it never stops moving: a slow sweep, lovely on a sustained pad or a guitar in a bridge. The glide is a share of the step, so it follows RATE and the tempo.
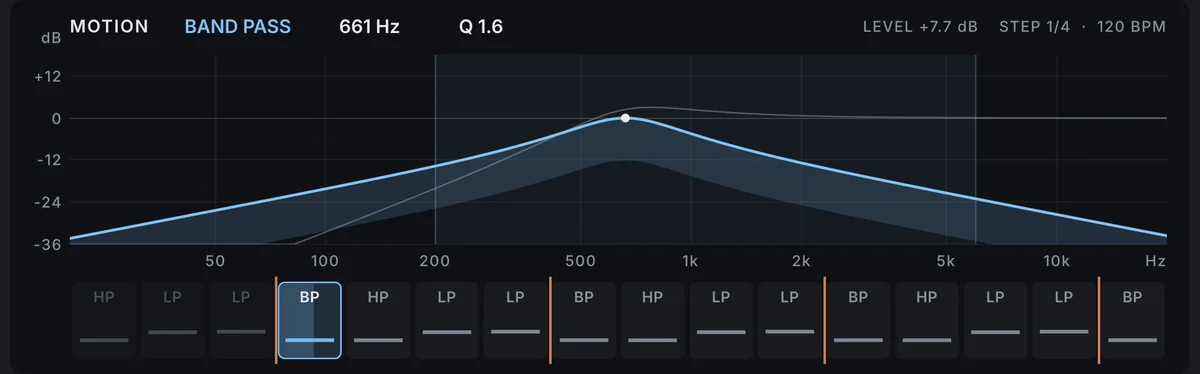
The MOTION display shows the filter now and on the next step, and the STEPS lane underneath shows the pattern around the step that is playing, so you see what NEW or CHAOS did before you listen. For a build, automate MIX from 0 % to 100 % over the last four bars before the drop and cut it back on the downbeat. Keep it off the lead vocal and the low-end anchors; one moving part at a time reads as intent, three read as clutter.
Texture for sections with VEIRA Vinyl
Contrast doesn’t have to be about level. An intro that sounds like an old record makes the full band feel huge when it comes in. VEIRA Vinyl, which is free, puts the music on a record. AGE gives it the band of an old record and cartridge: the lows roll off (up to 140 Hz at full), the highs come down (to 4.5 kHz) and the stereo narrows. WOW makes the speed waver once a turn of the record.
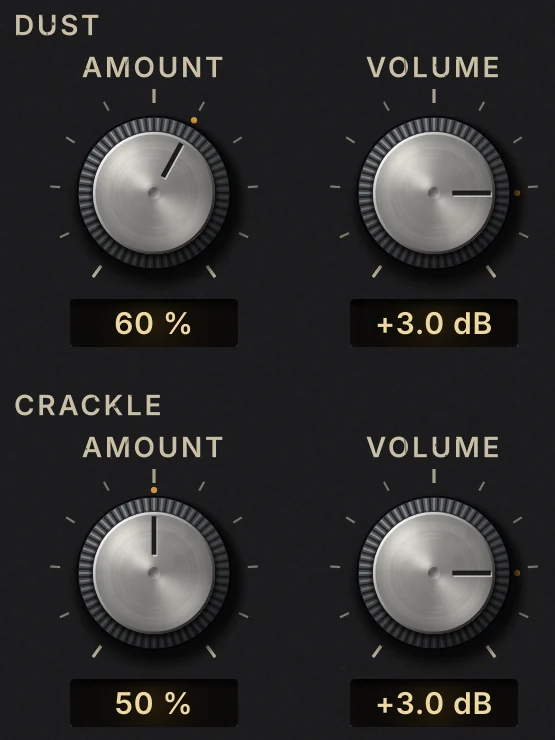
DUST adds the surface’s hiss and fine ticks, CRACKLE its pops and, from 60 %, a scratch on every turn, each with its own AMOUNT and VOLUME. For an intro, put VEIRA Vinyl on the mix bus with AGE around 45 % and a little DUST and CRACKLE, then automate all three to 0 % on the first downbeat of the verse. Or keep a faint layer of DUST under a sparse verse and take it out for the chorus. The presets run from Fresh Pressing, with the noise about 46 dB under the music, to Texture, about 17 dB under.
Keeping the song moving
Before you call the mix finished, play it top to bottom without stopping and ask at every section change: what is new here? If the answer is nothing, add something small: a fader lift, a send throw, VEIRA Motion Filter opening up, a texture that leaves. If the answer is everything, take something away. Movement works because the rest of the mix holds still around it. Next we turn to the mix bus, where the whole song comes together.