Blog · Mixing from start to finish · Part 7 of 20
The drum bus and parallel compression: gluing the kit together
How to balance the close mics, overheads and room on a drum bus, glue the kit with bus compression, and add parallel compression for dense drums that still hit hard.
In part 6 we shaped the kick, snare and toms one by one. Now the kit has to sound like one instrument played in one room, and that happens on the drum bus, where the close microphones, the overheads and the room meet.
Build the kit around the overheads
First get the balance right. Route every drum track to one bus and start with the overheads alone: they are the picture of the kit, and the close microphones fill in what they miss. Bring the kick and snare up underneath until they have weight and snap, then the toms, then the room microphones until the kit has depth without washing out. Flip the polarity of the snare and of the kick and keep whichever setting sounds fuller against the overheads. Pan the close microphones to match where each drum sits in the overheads, from the drummer’s or the audience’s side, but stay consistent.
Overheads often carry too much cymbal and too little body; room microphones bring boom and wash. Don’t fix all of that yet: bus compression changes how much of them you hear between the hits, so set their final levels later.
Glue the kit with VEIRA Drum Bus
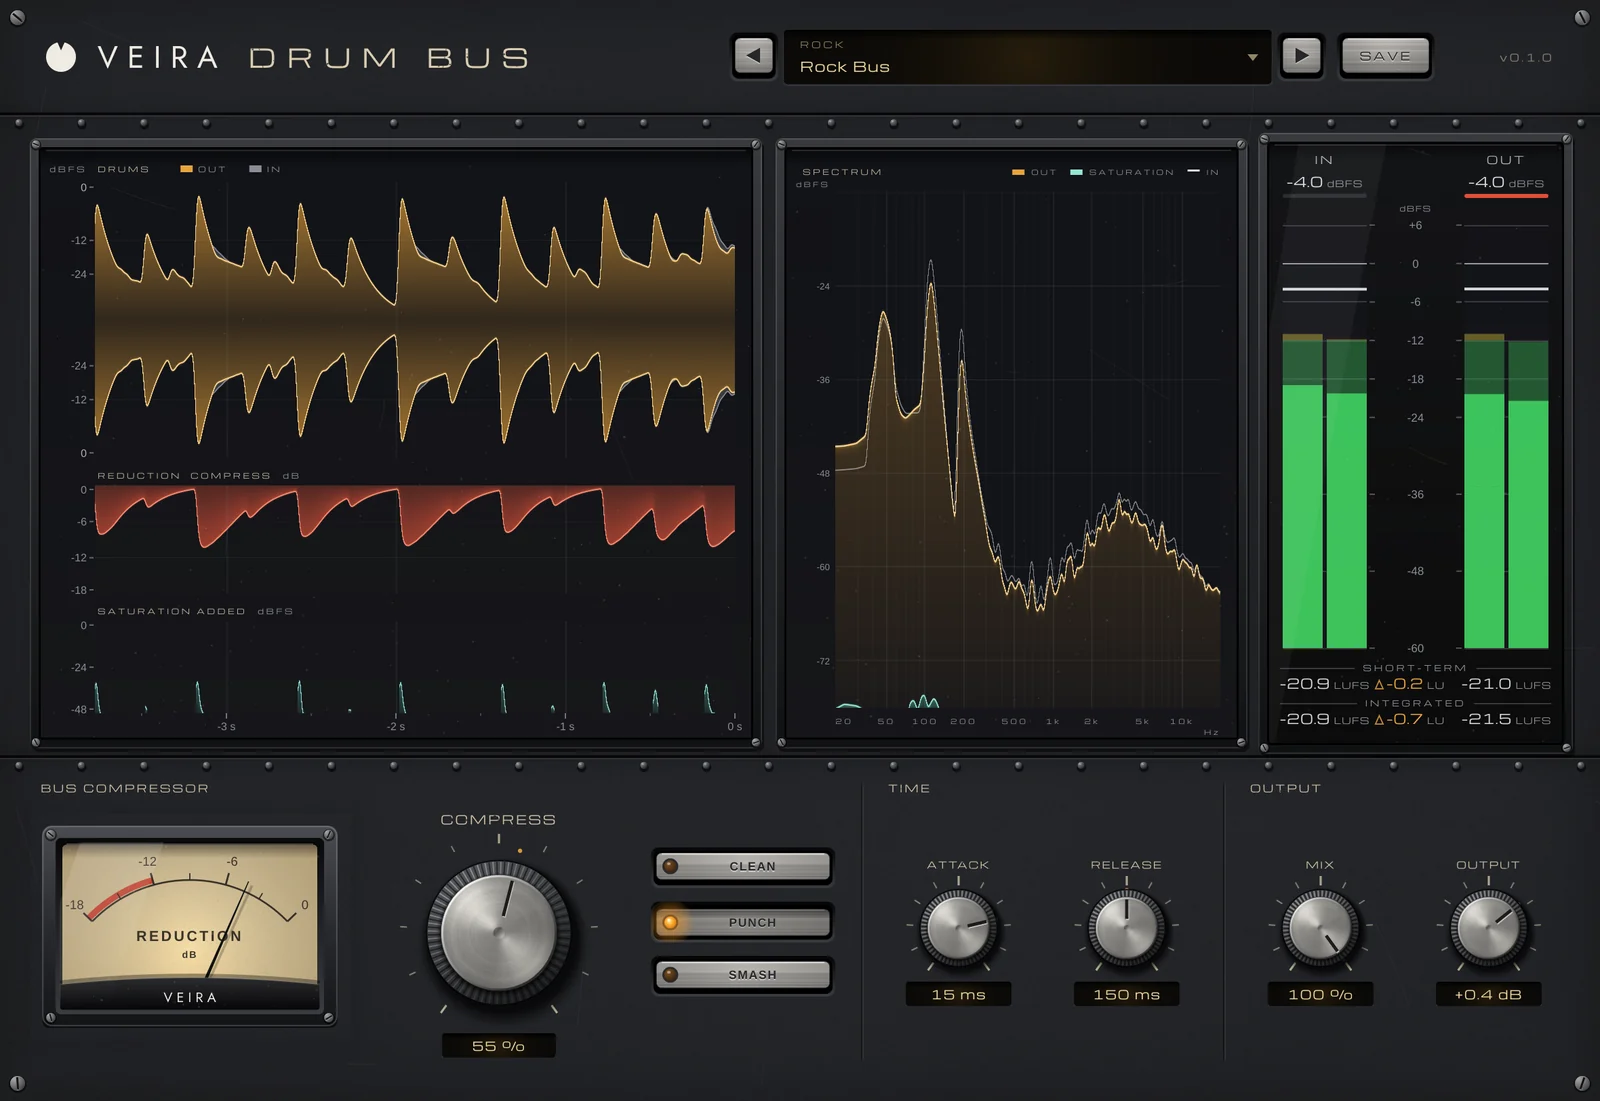
Put VEIRA Drum Bus on the drum bus. It has few controls and a hidden EQ: before anything else, the drums lose 5 dB at 350 Hz in a broad bell, the boxy, cardboard part of a kit. It is always on and costs about 0.4 dB of level on a whole kit. Then one big COMPRESS knob sets how hard the kit is compressed, and three buttons set how:
- CLEAN: transparent glue, up to 4:1 with a 10 dB knee and no saturation. A good start for jazz, acoustic and most pop.
- PUNCH: a firmer bus with gentle saturation, up to 6:1. The default, and a good start for rock.
- SMASH: heavy compression with harder drive, up to 20:1, for drums that should sound pushed.
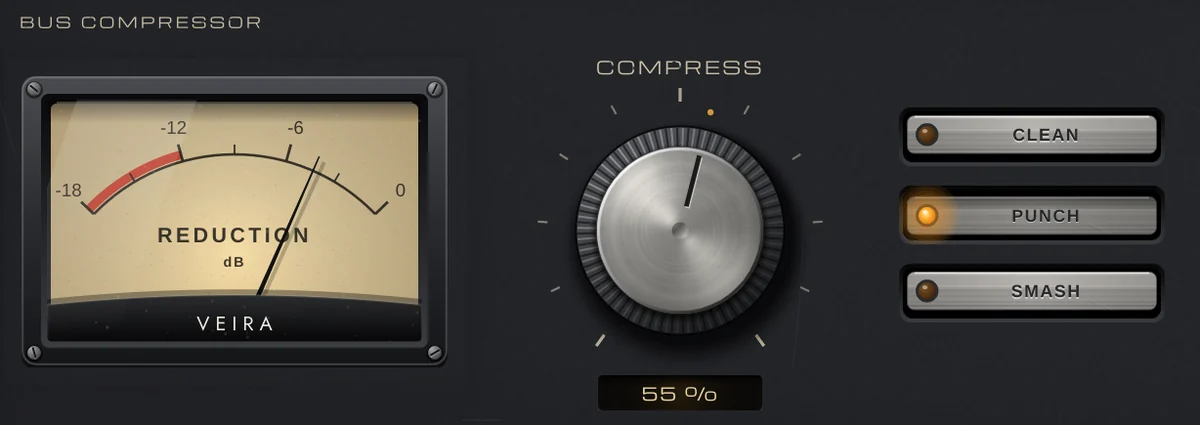
COMPRESS isn’t a threshold in dBFS: it compares the drums’ peaks with their own long-term level, so the same setting does the same on a quiet bus and a loud one. On a kit at the defaults, 60 % takes off 3.3 dB on average on CLEAN, 5.3 dB on PUNCH and 7.9 dB on SMASH. For glue, aim for the REDUCTION needle moving 2 to 4 dB on the hits. The level is given back automatically, so on bypass you hear the compression, not a louder bus.
Attack and release on a bus
ATTACK (0.1 to 30 ms) decides how much of each hit gets through: slower settings let the front of the hit through first, for punch; faster settings tame it. The compressor sees the drums 1 ms ahead, so a fast ATTACK catches a hit from its first sample. RELEASE (20 to 1,000 ms) decides what happens between the hits: a fast one brings the room and the ghost notes up, a slower one holds the kit together. Starting points:
- Glue: ATTACK 10 to 30 ms and RELEASE 150 to 300 ms, roughly in time with the groove.
- Energy: ATTACK around 10 ms and RELEASE 50 to 100 ms, so the room breathes up after every hit.
- Control: ATTACK 1 to 3 ms when a few hits poke out too far.
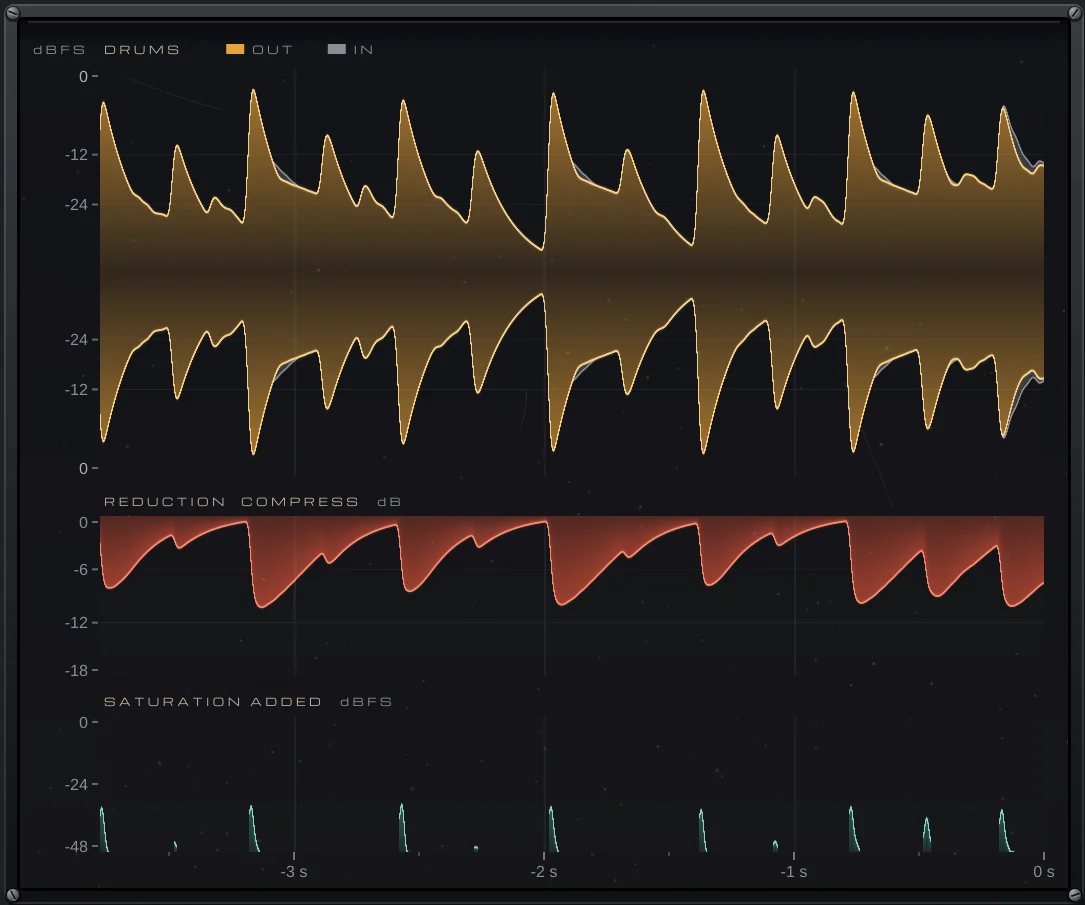
The DRUMS display scrolls through the last 4 seconds and shows in grey what came in where it was louder, so you see exactly what COMPRESS took off the hits. Underneath, the REDUCTION lane shows whether the compressor recovers between hits, and the SATURATION ADDED lane shows what PUNCH and SMASH add.
Parallel compression with VEIRA Squasher
Parallel, or New York, compression blends a heavily compressed copy of the drums under the dry ones. The dry drums keep the punch of the hits; the crushed copy brings up the body of the snare, the ring of the toms, the room, the ghost notes and the hi-hat detail: denser drums that still hit.
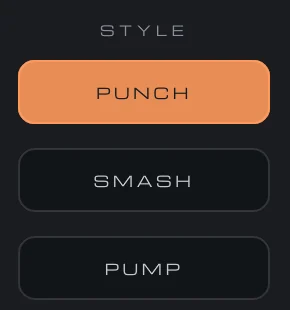
VEIRA Squasher does this on one knob. A sensible starting order is to put it on the drum bus after VEIRA Drum Bus. SQUASH lowers the threshold and raises the ratio together, from 10:1 up to 100:1, against the drums’ own peak level, and an automatic makeup brings the squashed drums back to the dry kit’s loudness. MIX blends them with the dry drums, lined up to the sample, so the blend never comb-filters. As a starting point, try SQUASH at 50 % and MIX at 20 to 30 %; raise MIX until the kit feels thicker, and back it off as soon as you notice the effect itself. STYLE picks the character:
- PUNCH: the fronts of the hits through, the body and the room up. The classic parallel drum sound.
- SMASH: everything flattened, the all-buttons-in sound. Tucked under the dry kit at 20 to 40 %, it adds grit and energy.
- PUMP: the kick pushes the room and the cymbals down and they breathe back between the hits, for dance music and big, ambient rock drums.
For a separate return you can ride and treat on its own, send the drums to an aux and load VEIRA Squasher there with one of its Creative FX presets, which give you the squashed drums alone. VEIRA Drum Bus has a MIX of its own too, with the blend matched in loudness, so SMASH blended in at 25 to 50 % is another route to the same idea.
Overheads, room and the final balance
Now go back to the overheads and the room. Bus compression and parallel squash both bring them up between the hits, so you’ll often need less room microphone than before. If they need treatment of their own, start from VEIRA Drum Bus’s Rooms & Overheads presets or VEIRA Squasher’s Room & Ambience folder. Keep the room below the close microphones, or the whole kit starts to sound far away.
- Too much bus compression: the kit stops breathing and the snare loses its crack.
- A parallel blend so loud that the drums sound flat and noisy.
- Judging it all in solo instead of with the bass and the music.
Play the drums with the rest of the song, bypass each plugin in turn, and keep what makes the song move. In part 8 we fit the kick together with the bass.