Limiting a master: loud enough without losing punch
How to set a limiter’s ceiling and gain on a master, how far to push it, how to tell when it starts costing you punch, and why you should compare at matched loudness.
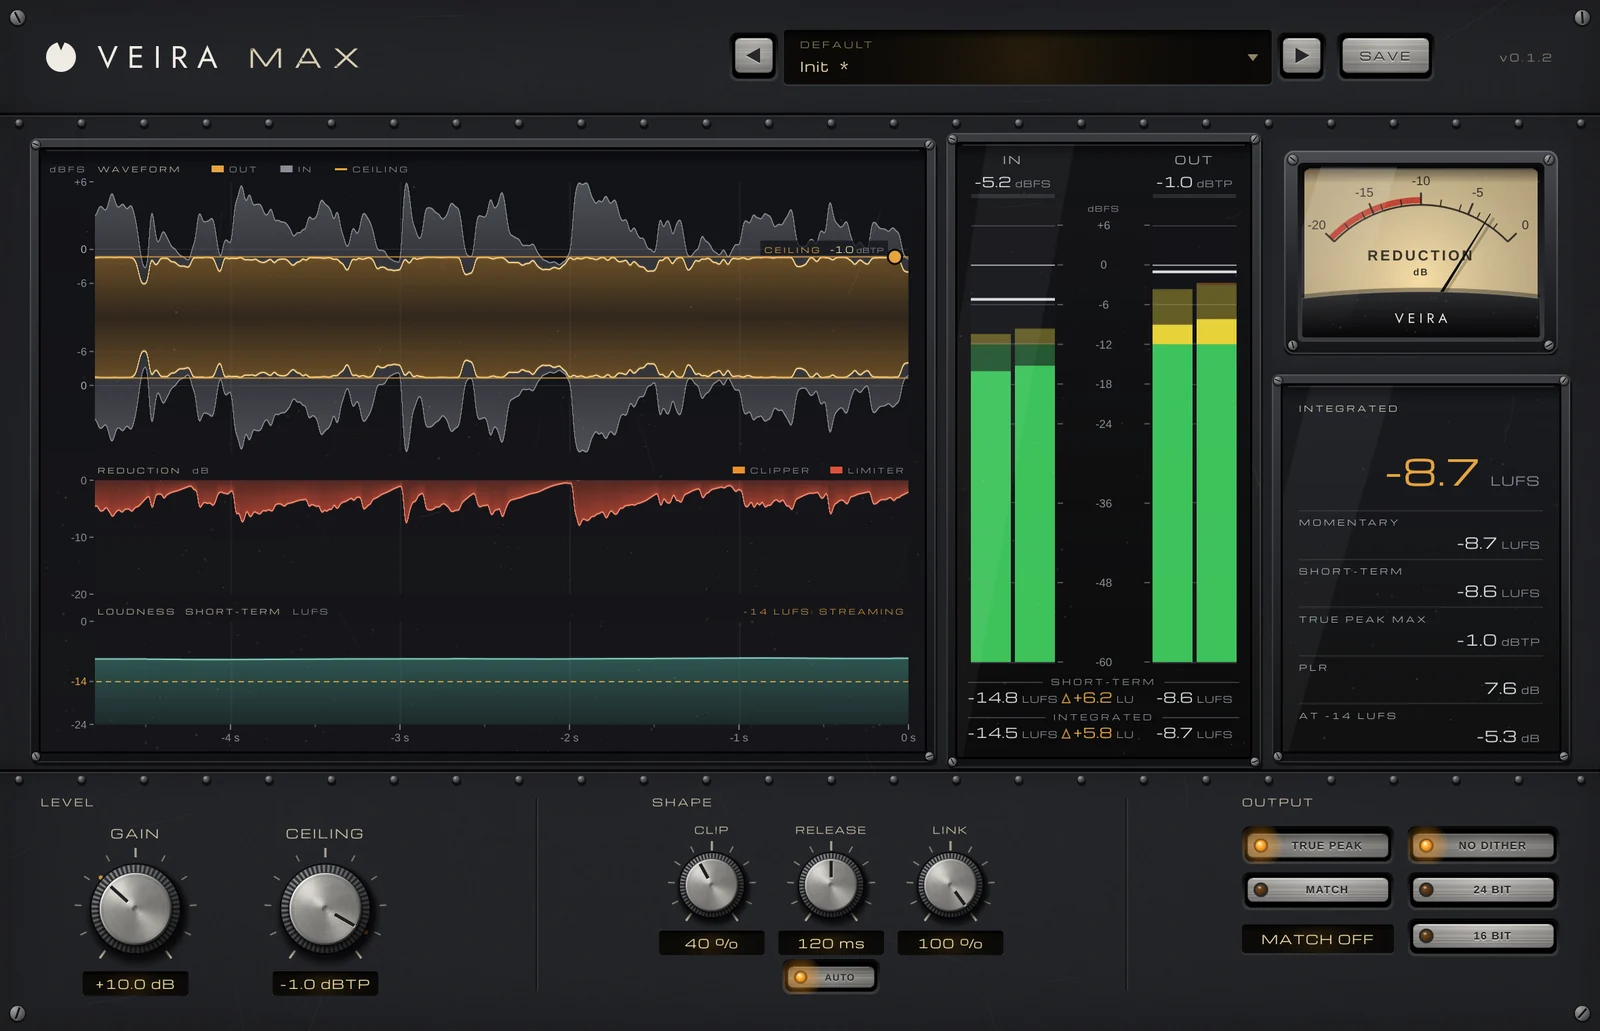
The last thing on most masters is a limiter. It catches the peaks so you can bring the whole song up to a competitive level without anything going over. Pushed gently, it’s invisible. Pushed too hard, it flattens the drums, blurs the low end and makes the chorus feel no bigger than the verse. The skill is knowing where that point is, and stopping a little before it.
Set the ceiling first
The ceiling is the highest level the limiter will let out. Converting a master to a streaming format can create peaks a little above the original, so a ceiling of −1 dBTP, measured in true peak rather than sample peak, is a common and safe choice. Some engineers go lower, to −2 dBTP, for very loud or bass-heavy masters. Set it once and leave it alone while you work on the gain.
Bring the gain up while watching the reduction
Raise the gain into the limiter slowly and watch how much it takes off. A couple of decibels on the loudest hits is usually transparent. As you go further, listen to the kick and snare: when they stop jumping out of the mix and start to feel pasted on, you’ve gone too far. Different material tolerates very different amounts, so let the music decide rather than a number.
Know your loudness targets
Streaming services turn loud songs down to a reference level, often around −14 LUFS integrated, so a master much louder than that is simply played quieter, with less punch left in it. That doesn’t mean every master should sit at −14 LUFS; many genres are mastered louder on purpose. But it’s worth knowing how much you’ll be turned down, and deciding whether the extra loudness is worth what you give up for it. Four numbers tell you most of what you need:
- Integrated loudness, in LUFS, tells you how loud the whole song is.
- The true-peak maximum tells you whether anything gets over the ceiling between the samples.
- PLR, the difference between peak and loudness, shows how much punch is left: the lower it gets, the flatter the master.
- Short-term loudness shows whether the chorus is still louder than the verse.
Compare at the same loudness
Louder almost always sounds better for a few seconds, which makes it easy to fool yourself. Before you decide, listen to the limited master turned down to the level of the unlimited mix. If it still sounds as good or better, keep it. If it sounds flatter or smaller, back the gain off a decibel or two and listen again.
Doing it with VEIRA Max
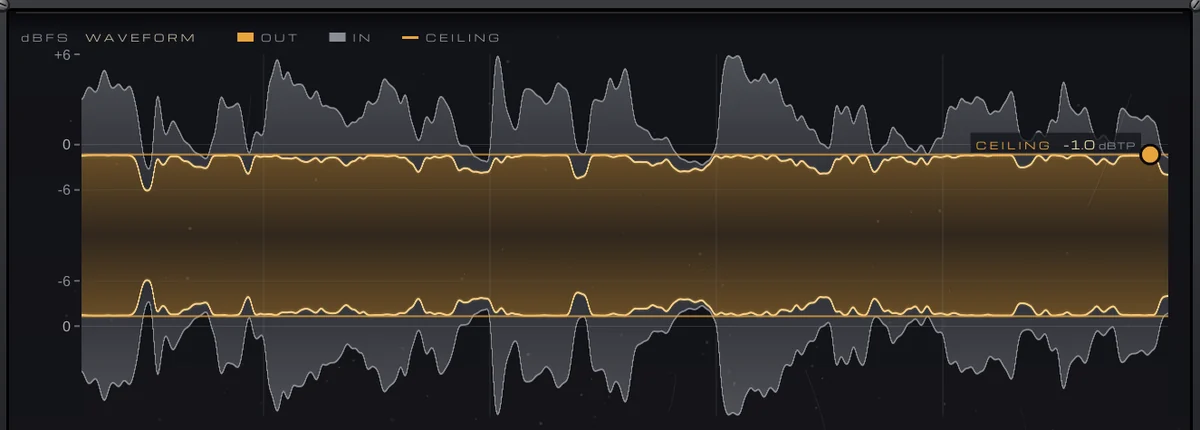
VEIRA Max is a mastering limiter with two main controls: turn GAIN up and it keeps every peak under the CEILING, in true peak when TRUE PEAK is on. There’s no automatic target, so you set the loudness by ear and by the loudness panel. The waveform draws the output in amber and, in gray above it, whatever Max took off, and you drag the ceiling line to set it.
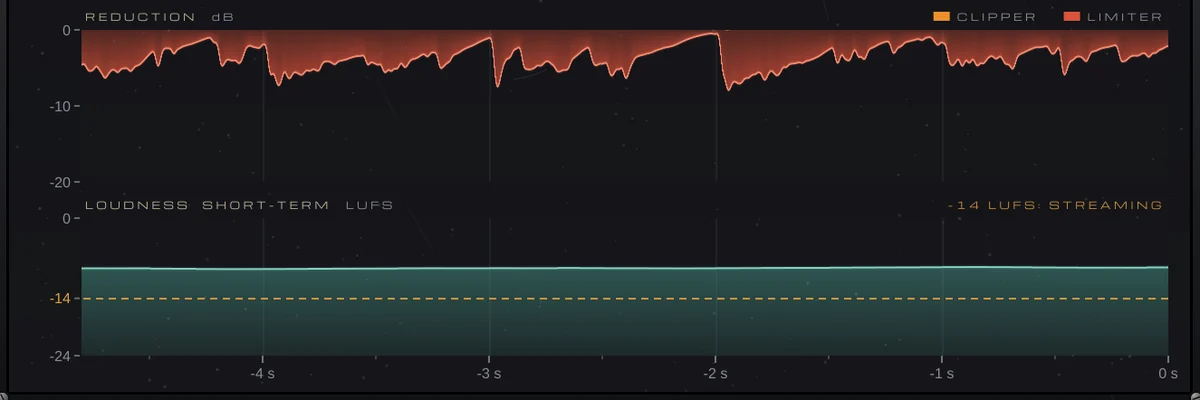
CLIP sets how much of the peak control an 8x-oversampled soft clipper does before a 2 ms lookahead limiter: at 0 % it’s all limiter and cleanest, and more clipping buys extra loudness with a little edge. RELEASE runs from 5 ms to 1 s, or AUTO lets go fast after short peaks and slowly through dense passages. Under the waveform, the REDUCTION lane shows what the clipper and the limiter take off, and the LOUDNESS lane follows short-term loudness against −14 LUFS.
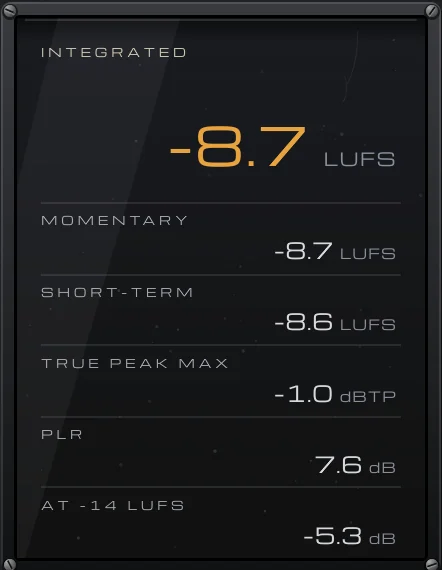
The loudness panel gives you integrated, momentary and short-term loudness, the true-peak maximum, PLR and how far a streaming service at −14 LUFS will turn the master down. Press MATCH to hear the result at the input’s loudness, and add 24- or 16-bit DITHER for the final bounce. The Streaming, Loud and Broadcast presets each note what the loudness panel should read, since the right GAIN depends on your material.